

So the family room is finally finished. Well finished for today. I think it will be one of those rooms that changes a little here and there. As I find new things that I love and try to incorporate them in some way. But the major stuff, like painting and the board & batten installation, are finished.
So let’s start with that. The board & batten. It’s not hard at all to install this stuff. It’s just a few, time consuming, little steps. But it makes a BIG impact on the look of a room. We love how it turned out.
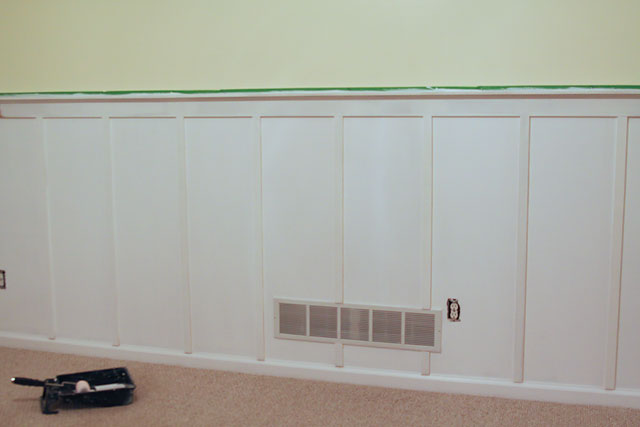
So lets get started. First we painted the upper section of the walls the yellow color that we FINALLY decided on, and the lower half white in preparation for the board and batten treatment.


Then we had to cut several 3 ½” wide pieces of 8’ MDF for the top rail and the shelf. Then we also cut several 1 1/2” wide, 46” tall, strips of MDF for the vertical pieces. We only needed 2 – 4’x8’ sheets of MDF to do the entire space. And we still have some left over for other projects. I believe they were around $20 per sheet. So not very much money for all this awesomeness!
OK. So my first piece of advice if you decide to do this in your home, DEFINITELY take your saw OUTSIDE to cut the pieces. MDF causes A LOT, like TONS, of saw dust. And not just a little pile on the floor under your saw. I mean saw dust on everything within a 20’ radius of the saw. How do I know? Because we did not cut ours outside, we cut ours in our garage, and now I have ½” of dust on EVERYTHING in my entire garage. A HUGE mess!

After we cut all of our pieces, we installed everything with a nail gun. You don’t have to have a nail gun. You could also install it with a hammer and nails. It will just take a little more time for the installation.

We spaced our boards 14” apart. Except for places that we had to work around an outlet, window, or door. We hung them in whatever manner looked best for the area.

After installing the vertical and horizontal boards, we also installed a ledge and a piece of molding to sort of finish out the look.

This little ledge makes it so easy to prop things for decoration in an area to see if you like it there without having to actually put holes in your walls. And it’s nice because you can move things around or add new things whenever you like without having to repair and paint nail holes all the time. (I have already taken advantage of this little perk multiple times!)
After installing all the boards, I filled the nail holes with spackle and caulked all the seams (actually my girlfriend, Susan, caulked all the seams. I have a picture of her helping me, but she would probably kill me for posting it!). Then I painted two coats of white semi gloss paint to finish it up.


I’ll be back soon with the rest of the room re-do’s.
So what do you think? Think you might like to try this somewhere in your house? I guarantee you will love it!


I’ll be back soon with the rest of the room re-do’s.
So what do you think? Think you might like to try this somewhere in your house? I guarantee you will love it!


I found your blog through another blog and I absolutely LOVE this look. So much so that I'm going to try to replicate it. This may be a stupid question, but can you explain the pieces that make up the ledge - is that one piece that you can buy or did you fashion that yourself? Beautiful room!
ReplyDeleteCecilia the ledge is made up of mdf and a piece of cove moulding. There is a 3 1/2" piece on the wall, then a 2" piece sitting on top of the 3 1/2" piece to make the ledge. Then we added a piece of cove moulding where the two meet to help support the ledge and to give it more of a finished look.
ReplyDelete